
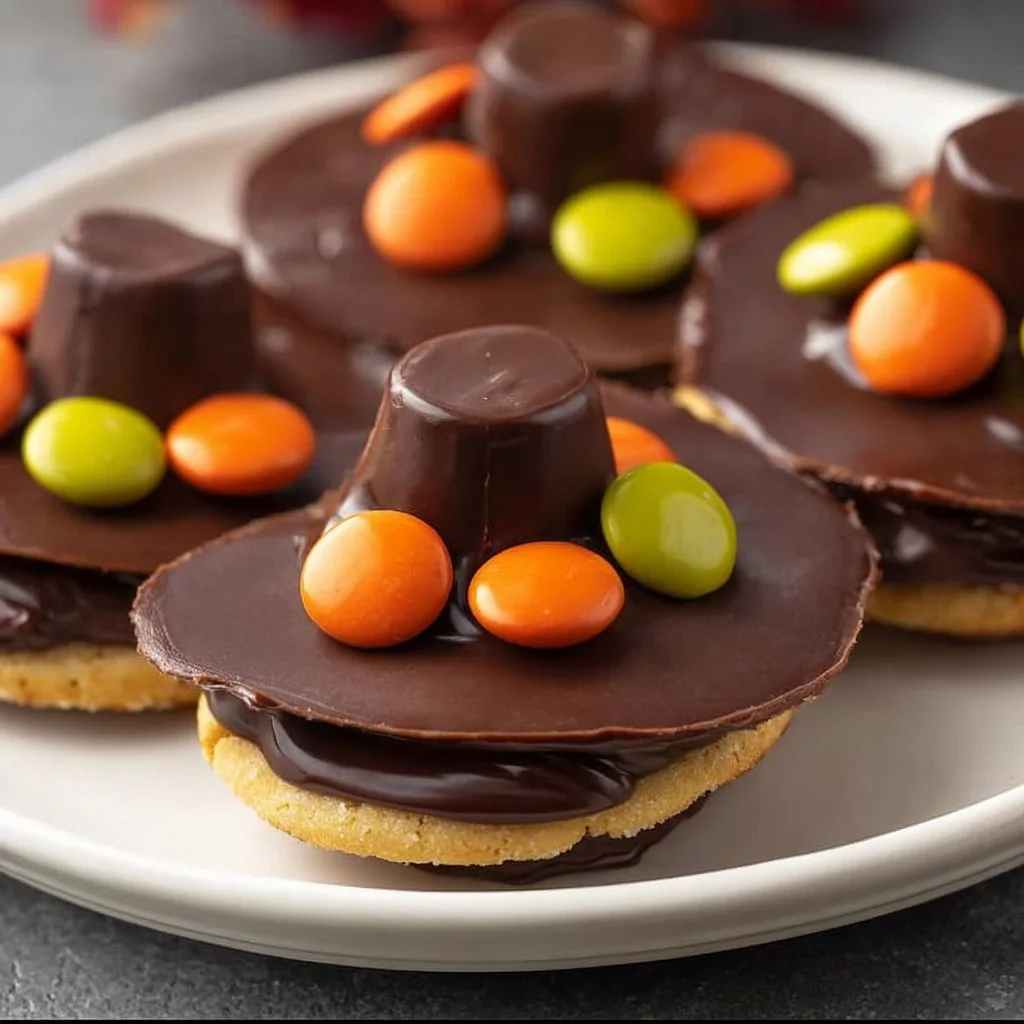
Ah, Thanksgiving! There’s something so magical about this time of year—the air is full of warmth and spice, family gathers around the table, and sweet treats fill the cozy kitchen. One of my favorite traditions involves whipping up batches of Pilgrim Hat Decorated Cookies. It all started on a chilly November afternoon while I was searching for a festive treat to share with my kids. As we dived into our cookie-decorating frenzy, these adorable hats emerged, and instantly, a tradition was born.
Picture this: the rich, chocolatey aroma wafting through the kitchen as the cookies bake, the creamy peanut butter spreading like a warm hug, all while a rain of melted chocolate glistens with expectation. Finally, the crunch and sweetness of candy corn perched on top complete the look, resembling the iconic hats that make Thanksgiving so special. These cookies have become a cherished part of my holiday celebrations, and I’m certain they’ll enchant your family just as they have mine!
Why You’ll Love This Recipe
- Easy to Make: With just a few ingredients, you can whip these up in no time!
- Crowd-Pleasing: They always disappear first at potlucks—who can resist a cookie that looks this cute?
- No Fancy Tools Required: A simple knife and a cookie sheet are all you need!
- Kid-Friendly: Perfect for involving little ones; let them tap into their creativity!
- Beyond Holiday Cheer: These can be made any time for a whimsical treat.
Ingredients
- Chocolate Cookies: The base of our pilgrim hats! I love using soft, chewy cookies that hold their shape nicely. If you’re feeling adventurous, try making them from scratch!
- Peanut Butter: This creamy delight adds a savory note that balances the sweetness. Choose smooth for easy spreading, or crunchy for a fun texture!
- Chocolate Melts: These melt beautifully and offer that glossy finish. You can find these in various flavors; dark chocolate gives a nice depth of flavor!
- Candy Corn: The quintessential fall treat that adds both color and a sweet crunch! Opt for the classic variety, or surprise everyone with some chocolate-covered varieties for an extra treat.
Full recipe card is below.
How to Make It
Step 1: Spread the Peanut Butter
Take a chocolate cookie and spread a generous layer of peanut butter on top. The warmth of the freshly baked cookies will slightly melt the peanut butter, creating a delightful texture!
Step 2: Melt the Chocolate
Melt the chocolate melts according to package instructions. As you stand over the bowl, let the sweet, chocolate scent surround you like a warm hug! Stir occasionally until it’s smooth and glossy—perfect for dipping.
Step 3: Dip the Cookie
Now, dip the top of the peanut butter-laden cookie into the melted chocolate to coat it. Let it shimmer like a cozy evening by the fire!
Step 4: Add the Candy Corn
Carefully place a piece of candy corn at the center of the cookie for decoration. This bright pop of color will have your cookies looking just like little pilgrim hats!
Step 5: Cool and Serve
Allow the cookies to cool until the chocolate is set. I like to plate mine on a festive platter and drape a cozy kitchen towel nearby, enhancing that winter warmth. Each luscious bite will transport you to holiday gatherings and sweet memories.
Pro Tips for Success
- Prep Ahead: Measure out all ingredients before you start to streamline the process.
- Melt Chocolate in a Double Boiler: This can help prevent burning; just don’t rush it!
- Experiment with Shapes: Use different cookies, like sugar cookies, for a unique twist.
- Chill the Cookies: If you want to speed up the setting process, pop them in the fridge for a bit!
Flavor Variations
- Nut Butters: Swap peanut butter for almond butter or sunflower seed butter for a nut-free version.
- Spiced Chocolate: Add a dash of cinnamon to the melted chocolate for a warm, spicy kick!
- Seasonal Sprinkles: Decorate with seasonal sprinkles instead of candy corn for added flair.
Serving Suggestions
These delightful cookies pair exquisitely with a warm cup of cocoa or spiced apple cider. For presentation, stack them on a wooden board and sprinkle with fall-colored edible glitter for that extra cheerful touch!
Make-Ahead & Storage
You can prepare the cookies a day in advance—just store them in an airtight container at room temperature. They’ll keep well for up to a week, though I doubt they’ll last that long!
Leftovers
Got any leftover cookies? Crumble them over vanilla ice cream to create a fun and delicious sundae that dazzles the taste buds!
Freezing
These cookies can be frozen! Wrap them in plastic wrap and then in a freezer bag. They’ll be happy up to three months. Just remember to thaw them at room temperature before devouring.
Reheating
If you prefer them slightly warm, pop them in the microwave for about 10-15 seconds. Trust me, the melty chocolate is worth it!
FAQs
Can I use regular cookies instead of chocolate?
Absolutely! Vanilla or gingerbread cookies can also work beautifully.
Are these cookies gluten-free?
If you use gluten-free cookies, yes! Just make sure all your other ingredients are gluten-free as well.
How can I add more chocolate flavor?
Try adding chocolate chips into the cookie dough or sprinkle some on top before the chocolate sets!
Do these cookies have to be refrigerated?
No, they can sit at room temperature in an airtight container, but refrigerating them can make for a delightful, fudgy treat.
Final Thoughts
As you gather around your kitchen this Thanksgiving season, I hope you feel inspired to share the joy of baking these charming Pilgrim Hat Decorated Cookies. They’re not just a dessert—they’re a warm little nod to traditions, laughter, and love. May your kitchen be filled with sweet aromas, your heart with gratitude, and your loved ones with joy! Until next time, keep the oven warm and the spirit bright!
Happy baking!
— Chef Caroline at TasteItRecipes.com
Pilgrim Hat Decorated Cookies
Ingredients
For the Cookies
- 1 batch Chocolate Cookies Soft, chewy cookies that hold their shape nicely.
- 1 cup Peanut Butter Choose smooth for easy spreading or crunchy for texture.
- 1 cup Chocolate Melts Dark chocolate adds a nice depth of flavor.
- 1 cup Candy Corn Classic variety or chocolate-covered for extra treat.
Instructions
Preparation
- Take a chocolate cookie and spread a generous layer of peanut butter on top.
- Melt the chocolate melts according to package instructions, stirring occasionally until smooth.
Assembly
- Dip the top of the peanut butter-laden cookie into the melted chocolate to coat it.
- Carefully place a piece of candy corn at the center of the cookie for decoration.
- Allow the cookies to cool until the chocolate is set.
- Plate the cookies and enhance the presentation with a cozy kitchen towel.