
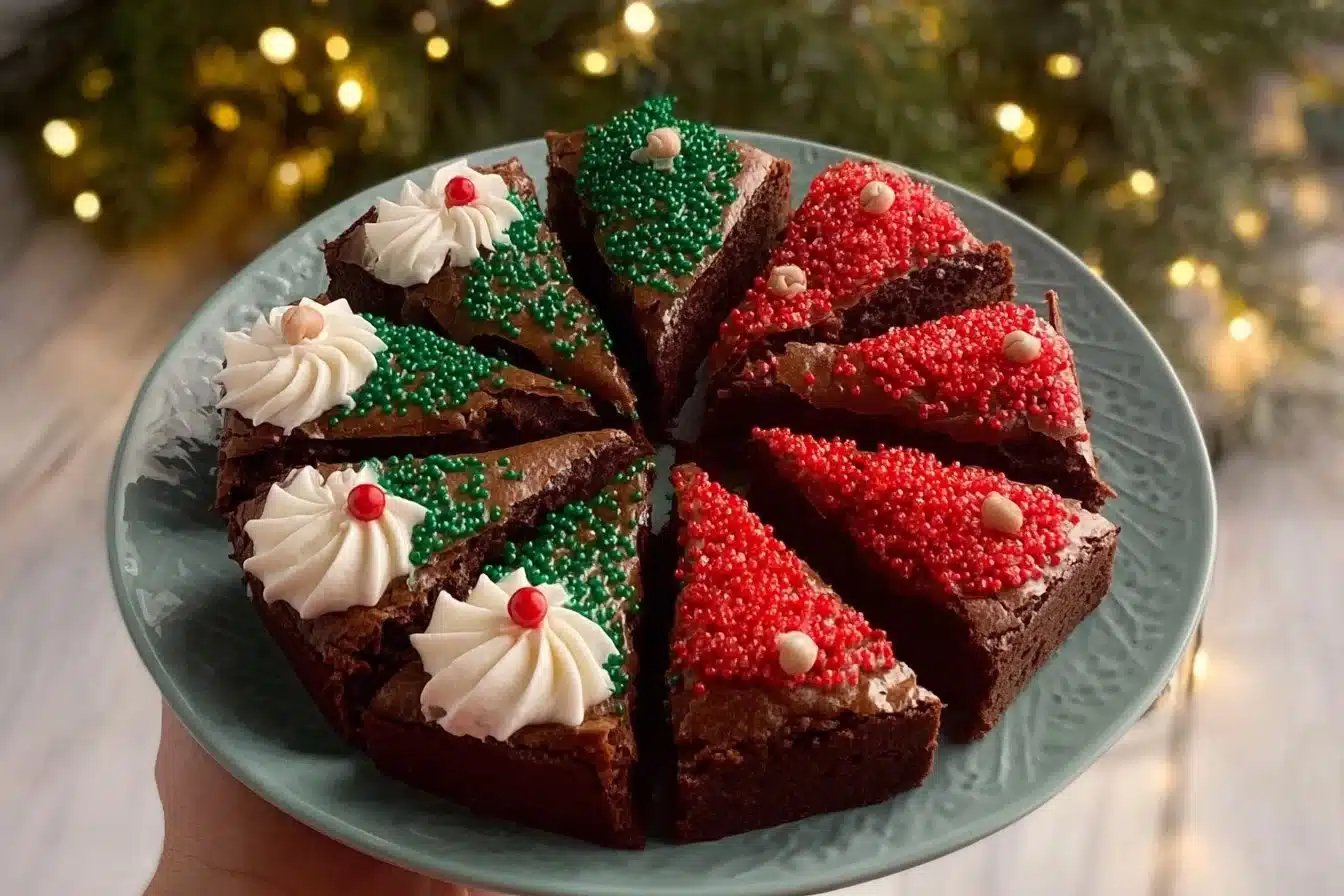
Frosted Christmas Brownies
Ah, Frosted Christmas Brownies— let me whisk you away on a cozy journey of sweet nostalgia! I stumbled upon this delightful recipe during one brisk December afternoon while rummaging through my grandmother’s old recipe box. The moment I whipped those brownies from the oven, their rich chocolate aroma enveloped our tiny kitchen, mingling with the scent of pine from the Christmas tree in the corner. Picture it: my children barely contained their giddy excitement as they eyed the warm, glossy squares cooling on the counter.
Table of Contents
Dressed up in their playful white frosting, they slowly transformed into whimsical Christmas trees and adorable Santa hats. Each bite was a celebration of sweet chocolate paired with the soft, creamy frosting that melted atop it. It was pure joy! This delightful treat quickly became our family’s favorite holiday tradition, and I can’t wait to share it with you, dear friends. Trust me; once you take your first bite, you’ll want to whip up a batch every holiday season!
Why You’ll Love This Recipe
- Easy to Make: With just a couple of boxes of brownie mix, you’ll be in and out of the kitchen in no time!
- Festive & Fun: Get creative with decorations and turn brownies into holiday art!
- Crowd-Pleasing: Perfect for parties, potlucks, or cozy family nights—everyone will adore them!
- Customizable: With a sprinkle of imagination, you can mix up flavors, colors, and shapes.
- Gorgeous Presentation: Frosted and decorated, these brownies are as beautiful as they are delicious!
Ingredients
2 Boxes of Brownie Mix (or a double batch of homemade brownies): Quick, easy, and foolproof! You’ll have those rich, chocolatey squares ready in a snap.
White Frosting: Sweet and creamy, this will be the canvas for all your holiday creations!
1-3 Jars of Edible Gel Food Coloring: Bring Christmas to life by mixing colors to create reds, greens, and more! (Look for natural alternatives to avoid artificial dyes if that’s your preference.)
Edible Gold Stars: These sparkly toppings that add a touch of festive magic to each brownie.
White Pearl Sprinkles: They provide a delightful crunch and shimmer, making every bite feel like a celebration!
Icing Bags: Using these will help you achieve that professional frosting look—you’ve got this!
Frosting Tips (large star – 1M): A star tip will create beautiful, festive decorations that are sure to impress!
Full recipe card is below.
How to Make It
Step 1: Preheat & Prep
First, preheat the oven according to your brownie box instructions (don’t skip this!). Spray a 9-inch springform pan with oil—this will help ensure those brownies come out perfectly!
Step 2: Mix & Pour
Mix both of your brownie mixes according to package instructions, and then pour that luscious batter into your prepared pan. Oh, the chocolatey goodness already!
Step 3: Bake to Perfection
Bake according to the packaging instructions, or until a toothpick comes out clean. The smell of baking brownies will fill your kitchen with the ultimate cozy winter vibe!
Step 4: Cool & Cut
Once the brownie has baked and cooled (patience, my friend!), remove it from the springform pan, and place it on a cutting board. Cut the brownie into 8 perfect triangles.
Step 5: Prepare Your Frosting
In two small bowls, mix white frosting with red food coloring in one and green food coloring in the other. This is where the fun begins!
Step 6: Fill Your Icing Bags
Place the red frosting, green frosting, and white frosting into individual icing bags with your favorite frosting tips. Now you’re ready to unleash your inner artist!
Step 7: Decorate Away!
Time to let your creativity shine! Decorate your Christmas tree brownies with green frosting, white pearl sprinkles, and edible gold stars. For your Santa hat brownies, pipe on both green and white frosting. The joy is in the details!
Step 8: Serve & Enjoy!
Ah, finally, slice into those festive creations and let the merriment flow!
Pro Tips for Success
- Use room temperature frosting: This makes it easier to pipe and decorate beautifully.
- Go slow with colors: Add food coloring gradually to reach your desired shade.
- Test your brownie doneness: Every oven is different! Use the toothpick test to avoid over-baking.
- Let brownies cool completely: This will prevent the frosting from melting off and keep those decorations intact.
Flavor Variations
- Nutty Surprise: Add chopped nuts to the brownie batter for an extra crunch.
- Minty Fresh: Incorporate a drop of peppermint extract into your frosting for a refreshing twist.
- Caramel Swirl: Drizzle caramel sauce on top for a sweet, gooey addition.
- Chocolate Drizzle: Melt assorted chocolate chips for a drizzle on top after frosting.
Serving Suggestions
Pair your brownies with a warm cup of cocoa or a creamy eggnog for that ultimate festive gathering. For a sophisticated touch, try pairing with a scoop of vanilla ice cream for a cozy brownie sundae!
Make-Ahead & Storage
You can bake these brownies a day in advance! Just keep them in an airtight container at room temperature. They’ll stay delicious for about 3-4 days, but I doubt they will last that long!
Leftovers
If you have brownies left, chop them up and toss them into a festive trifle or layer them with whipped cream and some fruit to create a delightful dessert.
Freezing
Yes, you can freeze your decorated brownies! Wrap them individually in plastic wrap and then place them in a freezer-safe container. They’ll keep for up to 2 months. When ready to enjoy, simply thaw at room temperature!
Reheating
For those who like warm brownies, pop them in the microwave for about 10-15 seconds, or use an oven set at 350°F for 5-10 minutes.
FAQs
Can I use homemade brownies instead of box mix?
Absolutely! Just be sure they’re prepared to a similar thickness as the boxed version.
How do I decorate with the frosting?
Pipe the frosting in swirling patterns or use the large star tip to create fun designs. Let your imagination run wild!
Can I use other colors for frosting?
Of course! Feel free to choose any colors you’d like to suit your festive theme!
What if I don’t have a springform pan?
No worries! A regular baking pan works just fine; just ensure to line it with parchment paper for easy removal.
Final Thoughts
Dear friends, as you delve into this Frosted Christmas Brownies recipe, I hope it brings as much joy to your kitchen as it has to mine over the years. Gather your loved ones, unleash your creativity, and let the aroma of chocolate and frosting fill your home. May every bite be filled with warmth, laughter, and love this holiday season. Happy baking!
With warm hugs and sweet wishes,
Chef Caroline 💖
Frosted Christmas Brownies
Ingredients
Brownie Ingredients
- 2 boxes Boxes of Brownie Mix Quick, easy, and foolproof!
- 1 White Frosting Sweet and creamy!
Decorative Ingredients
- 1-3 jars Edible Gel Food Coloring Mix colors for festive decorations.
- 1 pack Edible Gold Stars Adds festive magic.
- 1 pack White Pearl Sprinkles Provides crunch and shimmer.
- Icing Bags For decorating.
- 1 Frosting Tips (large star - 1M) Creates beautiful decorations.
Instructions
Preparation
- Preheat the oven according to your brownie box instructions and spray a 9-inch springform pan with oil.
Baking
- Mix both brownie mixes according to package instructions and pour the batter into your prepared pan.
- Bake according to the packaging instructions or until a toothpick comes out clean.
- Allow the brownies to cool before removing from the pan and cutting into 8 triangles.
Frosting Preparation
- In two small bowls, mix white frosting with red food coloring in one and green food coloring in the other.
- Fill individual icing bags with red, green, and white frosting.
Decoration
- Decorate the brownies with green frosting, white pearl sprinkles, and edible gold stars.
- For Santa hat brownies, pipe on both green and white frosting.
Serving
- Slice into your beautifully decorated brownies and enjoy!