
Do you ever crave something sweet that’s also refreshing and tangy? Imagine a vibrant dessert that packs a flavor punch, with the perfect blend of creamy and zesty. A homemade Key Lime Pie has the ability to transport you to a sun-soaked beach, where each bite is like a blissful escape. This pie is not just a treat; it’s a celebration of flavors that’s remarkably easy to whip up, making it a wonderful addition to any gathering or weeknight dinner.
What sets this recipe apart is its simplicity and ability to impress. With just a handful of ingredients, you can create a show-stopping dessert that’s sure to wow family and friends. Plus, it’s budget-friendly and can be made ahead of time, allowing you to enjoy more moments with loved ones. So, roll up your sleeves, and let’s dive into creating this delightful homemade Key Lime Pie!
Why Make This Recipe
First and foremost, the flavor of this pie is simply irresistible. The bright, tart key lime juice beautifully balances the sweetness of condensed milk and the buttery graham cracker crust. Each slice is a heavenly explosion of flavor that’s refreshing on a warm day.
You’ll be pleased to find that it requires minimal effort and just a few simple steps. With only a short baking time and an essential chill period, you can have this treat done in a couple of hours, making it perfect for a last-minute dessert.
On top of all this, it appeals to a wide range of tastes. Whether you’re serving it at a casual family dinner or a fancy gathering, this pie will undoubtedly be a crowd-pleaser.
How to Make Homemade Key Lime Pie
Ingredients
- 1 1/2 cups graham cracker crumbs
- 1/3 cup sugar
- 1/2 cup unsalted butter, melted
- 4 large egg yolks
- 1 can (14 ounces) sweetened condensed milk
- 1/2 cup fresh key lime juice
- Zest of 2 limes
- Whipped cream, for serving
Directions
Preheat Your Oven
Set your oven to preheat at 350°F (175°C). This step is crucial for achieving a perfectly baked crust.Prepare the Crust
In a mixing bowl, blend the graham cracker crumbs, sugar, and melted butter. Press this mixture firmly into the bottom and up the sides of a 9-inch pie pan. This forms the delicious base for your pie.Bake the Crust
Place the crust in the oven for about 8-10 minutes. You want it to come out lightly browned and fragrant. This time ensures a crunchy texture that pairs wonderfully with the creamy filling.Make the Filling
In another bowl, whisk together the egg yolks and sweetened condensed milk until the mixture is smooth. Take your time; this step is essential for a velvety filling.Add Lime
Incorporate the fresh key lime juice and lime zest into the mixture, stirring until everything is well combined. The zest adds an aromatic quality that elevates the flavor.Fill the Crust
Pour the luscious filling into the cooled crust and place it back into the oven. Bake for an additional 10 minutes, just until the filling is set around the edges and slightly jiggly in the center.Cool and Chill
Allow the pie to cool at room temperature for a bit, then refrigerate it for at least 2 hours before serving. This chilling time is vital for the filling to firm up properly.Serve
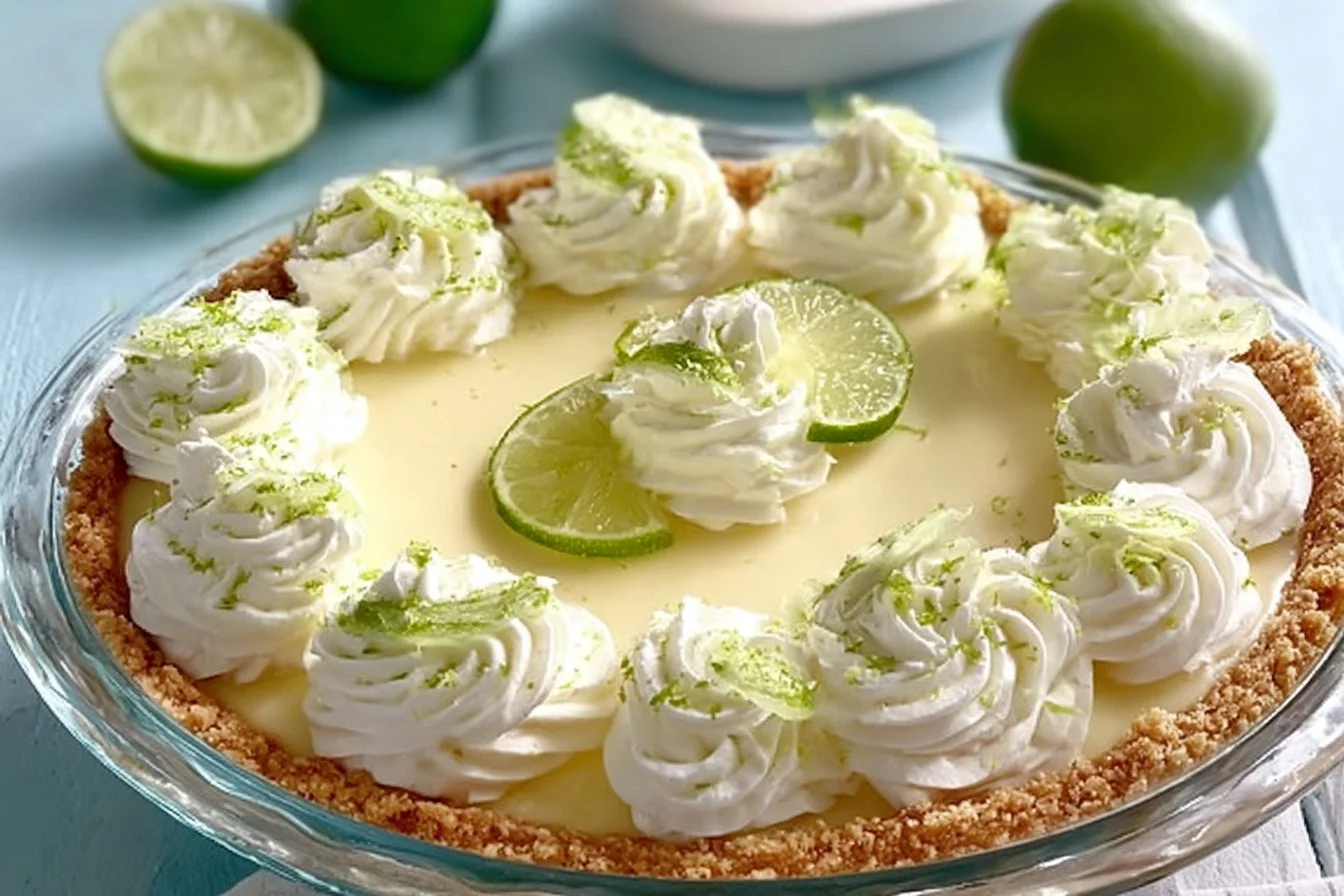
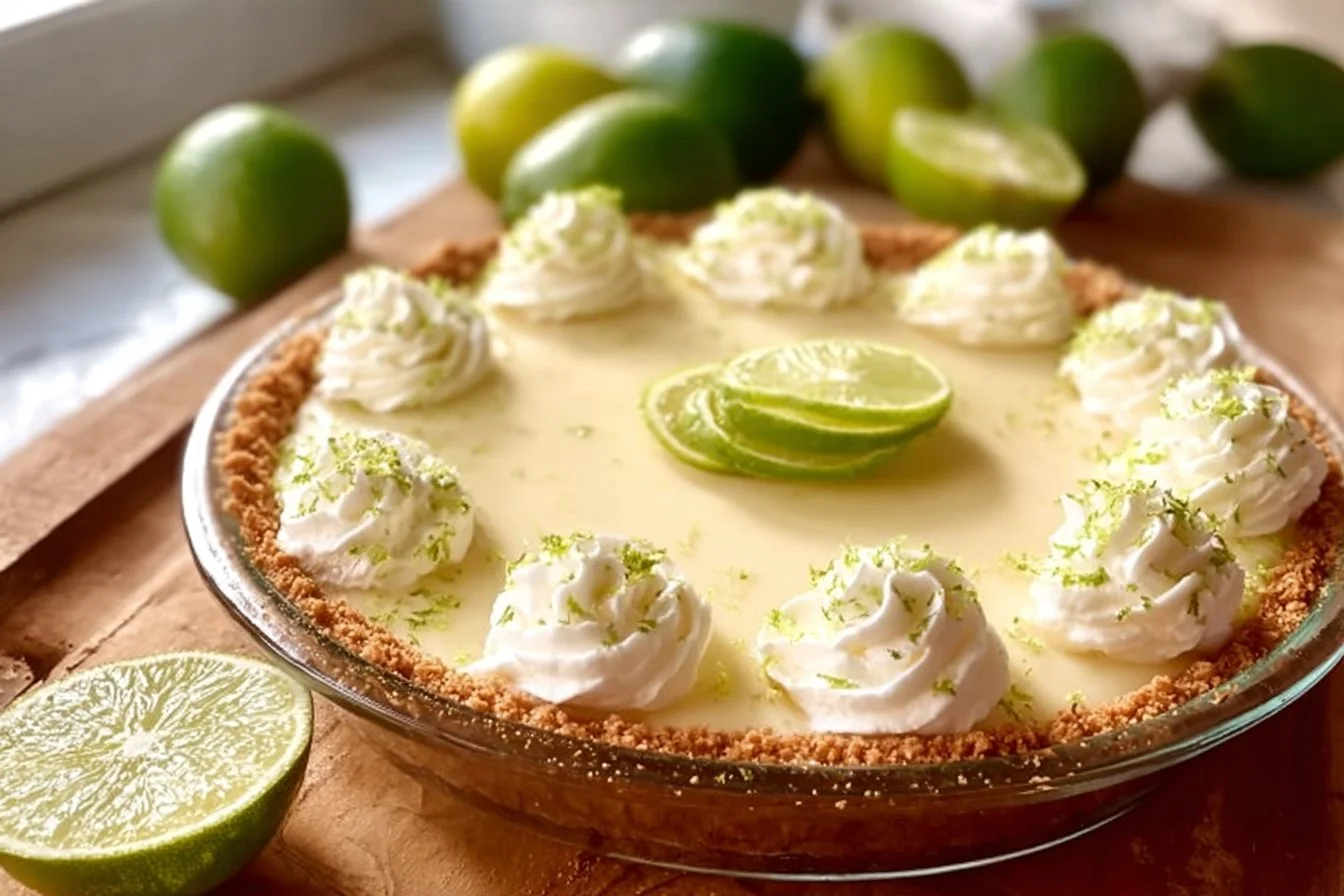
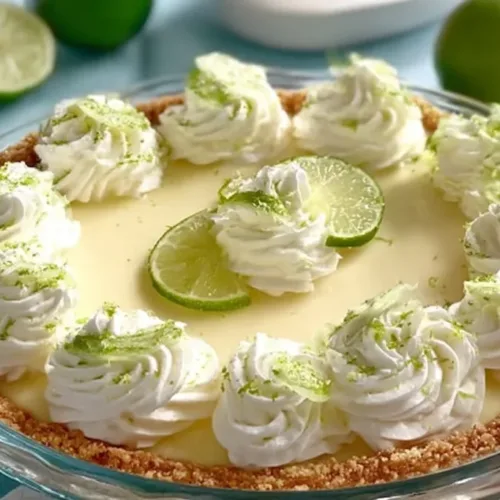
Slice up your chilly Key Lime Pie and serve generously topped with whipped cream. The contrast of the creamy topping with the tart filling is absolutely divine!
How to Serve Homemade Key Lime Pie
For the best experience, serve your Key Lime Pie chilled. The refreshing flavors and creamy texture are best enjoyed when the pie is nice and cool. When plating, consider a simple slice adorned with a swirl of whipped cream on top for an elegant presentation.
Pair this dessert with a light-bodied white wine or a refreshing iced tea for a complementing beverage. You could also enhance the experience by garnishing with lime wedges or zest to add a pop of color.
Whether for a casual family dinner or a special occasion, a slice of homemade Key Lime Pie is sure to bring smiles and satisfaction to your table.
How to Store Homemade Key Lime Pie
To store your leftover Key Lime Pie, place it in the refrigerator in an airtight container. It will keep well for up to 3-4 days, retaining its delightful flavors and texture. If you have more pie than you can consume within that time frame, you can freeze it. Wrap individual slices in plastic wrap and then place them in a freezer-safe bag. It can hold for up to 2 months in the freezer. When you’re ready to enjoy it, simply thaw in the refrigerator overnight.
Keep in mind to check for any signs of spoilage, like an off smell or discoloration, before you dig in.
Tips to Make Homemade Key Lime Pie
Use Fresh Juice: Fresh key lime juice offers the best flavor compared to bottled alternatives.
Avoid Overbaking: The filling should be set around the edges but slightly jiggle in the center; overbaking can lead to cracks.
Prevent Crust from Burning: If the edges browning too quickly, use strips of aluminum foil to cover them.
Cool Properly: Allow your pie to cool at room temperature before refrigerating to prevent a soggy crust.
Chill Your Bowl: For whipped cream, chill the mixing bowl and beaters to achieve better volume and a thicker consistency.
Taste Test: Adjust lime juice based on how tart you like your pie. More juice means a tangier flavor.
Leftover Transformations: Crumble leftover pie for a Key Lime Parfait; layer it with yogurt and berries!
Garnishes: Consider adding toasted coconut or crushed graham crackers on top of the whipped cream for added texture.
Avoiding Egg Strands: To avoid any stringy egg bits in your filling, whisk the egg yolks thoroughly before combining them with condensed milk.
Make Ahead: You can prepare the crust a day in advance; just store it in the refrigerator until you add the filling.
Variations
Vegan Key Lime Pie: Swap condensed milk with coconut cream and use aquafaba whipped for topping! It’s equally luscious and plant-based.
Chocolate Key Lime Pie: Add a layer of chocolate ganache over the cooled crust before adding the key lime filling for a sweet twist.
Gluten-Free Key Lime Pie: Replace graham crackers with gluten-free cookies for the crust, ensuring everyone can indulge.
Spicy Key Lime Pie: Mix a pinch of cayenne pepper into the filling for a surprising kick that perfectly complements the tartness.
Coconut Lime Dream: Blend shredded coconut into the crust and topping to amplify the tropical flavor.
FAQs
Can I make this ahead of time?
Absolutely! Homemade Key Lime Pie can be prepared a day in advance. Just make sure to store it in the fridge once it’s cooled completely. This also allows the flavors to meld beautifully.
How do I store leftovers?
Store leftover pie in an airtight container in the refrigerator for 3-4 days. If you want to keep it longer, freeze it by wrapping slices in plastic wrap and placing them in a freezer bag.
Can I freeze this dish?
Yes, Key Lime Pie freezes quite well! Wrap slices individually and keep them in the freezer for up to 2 months. Thaw in the fridge before serving.
What can I substitute for sweetened condensed milk?
You can use a homemade version made from blending full-fat coconut milk with sugar or a store-bought dairy-free alternative. This maintains a rich texture and sweetness.
How do I prevent the crust from burning?
Check on your pie as it bakes, and if the crust edges are browning too quickly, cover them with aluminum foil until the filling is done.
Is this gluten-free?
It can be made gluten-free by using gluten-free crackers for the crust. Just check the ingredient labels to ensure they’re certified gluten-free.
What if I don’t have a mixing bowl?
A large pot can serve as a makeshift mixing container if you don’t have a bowl; just make sure to whisk vigorously!
How do I know when it’s done?
The filling should be set at the edges but still slightly jiggly in the center. A subtle golden color on the crust also indicates it’s ready to come out of the oven.
Whip up this homemade Key Lime Pie for your next dessert, and watch it disappear in moments! Its refreshing flavor and easy preparation will leave you and your guests delighted. Enjoy this sweet treat that’s just bursting with zesty goodness!
Key Lime Pie
Ingredients
Crust
- 1.5 cups graham cracker crumbs
- 1/3 cup sugar
- 1/2 cup unsalted butter, melted
Filling
- 4 large egg yolks
- 1 can (14 ounces) sweetened condensed milk
- 1/2 cup fresh key lime juice
- Zest of 2 limes
For Serving
- Whipped cream, for serving
Instructions
Preparation
- Preheat your oven to 350°F (175°C).
- In a mixing bowl, blend the graham cracker crumbs, sugar, and melted butter. Press this mixture firmly into the bottom and up the sides of a 9-inch pie pan.
Baking the Crust
- Place the crust in the oven for about 8-10 minutes until lightly browned and fragrant.
Making the Filling
- In another bowl, whisk together the egg yolks and sweetened condensed milk until smooth.
- Incorporate the fresh key lime juice and lime zest, stirring until well combined.
Assembling the Pie
- Pour the filling into the cooled crust and return it to the oven. Bake for an additional 10 minutes until set around the edges.
- Allow the pie to cool at room temperature then refrigerate for at least 2 hours before serving.
Serving
- Slice and serve topped with whipped cream.