

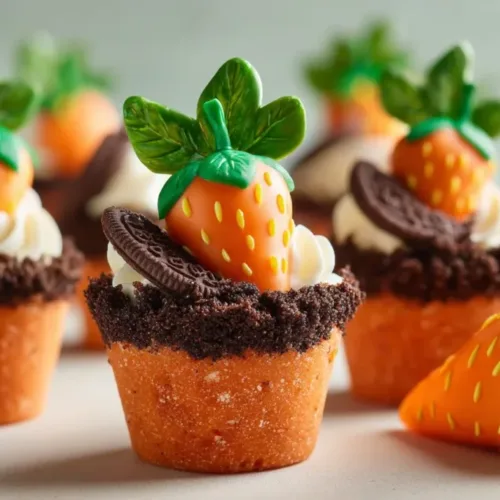
Are you ready to whip up a dessert that’s not just delicious but also a joy to assemble? Picture creamy chocolate pudding layered with crunchy Oreo crumbs, topped with bright chocolate-covered strawberries peeking out like mini carrots from a garden. This whimsical treat, known as Carrot Patch Dirt Cups, is perfect for any spring gathering, but it also works as a fun, anytime dessert for kids and adults alike. The best part? You can create these delightful cups in a flash, making them ideal for both spontaneous celebrations and planned events. With their vibrant colors and layered textures, these cups promise to be a showstopper.
Who wouldn’t want a dessert that is not only visually appealing but also incredibly easy to make? You’ll find that this recipe fits the bill perfectly, as it calls for simple ingredients and takes just minutes to prepare. Plus, it’s budget-friendly, ensuring you can treat your family without breaking the bank. Whether you’re hosting a festive gathering, celebrating a birthday, or need a sweet treat for a dinner party, these Carrot Patch Dirt Cups are guaranteed to impress.
Why Make This Recipe?
First off, the flavor combination of rich chocolate pudding and crunchy Oreos creates a delightful contrast that’s simply irresistible. Each spoonful feels like a special treat, making it hard to stop at just one cup.
The ease of assembly is another reason to get excited about this recipe. With just a handful of ingredients and quick steps, you can have dessert ready in no time, allowing you to spend less time in the kitchen and more time enjoying the company of loved ones.
Cost-effective and appealing to children and adults alike, Carrot Patch Dirt Cups give you the capacity to serve up a dessert that feels special without needing a lot of fuss. They’re not just sweets; they’re a chance for creativity and fun in the kitchen!
How to Make Carrot Patch Dirt Cups
Ingredients
- 2 (3.0 ounce) boxes of chocolate pudding mix
- 4 cups cold whole milk
- 20 Oreos, crushed
- 12 fresh strawberries
- 10 ounces white chocolate melting wafers
- Orange food coloring (or red + yellow)

Directions
In a large bowl, combine the pudding mix and cold milk. Stir vigorously for about two minutes until fully blended and let it set for approximately five minutes. The pudding should have thickened slightly by this time.
While your pudding is setting, take a microwave-safe bowl and melt the white chocolate wafers in 30-second increments. Stir after each interval until the chocolate is smooth and fully melted, which should take around 1-2 minutes total.
Add a few drops of orange food coloring to the melted white chocolate and mix well until you achieve your desired shade of orange.
Take your fresh strawberries and carefully roll them into the melted chocolate, ensuring the stems remain intact as they’ll be the finishing touch. Place the coated strawberries on parchment paper and let them set. Once firm, you can drizzle additional melted chocolate over them for an extra touch of elegance.
For the final assembly, spoon the thick pudding into little cups, sprinkle the crumbled Oreos on top to mimic dirt, and finish off with two of your chocolate-covered strawberries perched as if they’re carrots in a patch.
How to Serve Carrot Patch Dirt Cups
These delightful cups are best served chilled, allowing the layers to meld together beautifully. For presentation, consider placing them on a decorative platter or a rustic wooden board to enhance the playful garden theme. The addition of some fresh mint leaves can introduce a vibrant contrast and add a layer of freshness.
To elevate this dessert further, you might garnish with small edible flowers or additional chocolate drizzle for extra flair. Pair these cups with a light beverage, like iced tea or lemonade, to balance the richness of the pudding and cookies. Perfect for spring celebrations or family movie nights, these cups never fail to impress!
How to Store Carrot Patch Dirt Cups
You can store leftover Carrot Patch Dirt Cups in the refrigerator for up to 3 days. Make sure to keep them in an airtight container to maintain their freshness and texture. If you happen to make them ahead of time, it’s best to store the components separately and assemble just before serving for the optimal crunch of the Oreos.
Freezing these cups is not recommended due to the texture change that occurs with the pudding and fresh strawberries. However, if you have leftover pudding or crumbled Oreos, you can keep those in the freezer for up to a month. Just be sure to thaw them in the fridge overnight before use.
Tips to Make Carrot Patch Dirt Cups
Prep in Advance: You can prepare the chocolate pudding a day ahead. Just cover it with plastic wrap to avoid a skin forming on top.
Substitution Options: If you can’t find white chocolate melting wafers, regular white chocolate can work but may require a bit more tempering.
Common Mistake: Many people overlook the cooling time for the chocolate. Allow it to set completely for the best presentation.
Must-Have Equipment: Use disposable cups or jars for easy serving. Not only do they look cute, but they also simplify cleanup.
Make Ahead Trick: You can crush the Oreos and store them in a separate container until you’re ready to assemble your cups.
Texture Control: If your pudding isn’t thickening as much as you’d like, let it sit a bit longer in the fridge.
Flavor Enhancer: For a rich flavor twist, consider adding a teaspoon of instant coffee granules to the chocolate pudding mix for a mocha effect.
Dietary Adaptation: If you or your guests are gluten-free, you can swap Oreos for gluten-free cookies.
Creative Leftover Use: Use leftover pudding and crushed Oreos as a cupcake filling for an exciting twist on classic chocolate cupcakes.
Presentation Tip: If you have extra melted chocolate, consider drizzling it over the serving platter for an eye-catching finish.
Variations
Garden Fresh Delight: Substitute the strawberries with colorful gummy candies that mimic veggies, creating a playful twist that kids will adore.
Nutty Delicacy: For added texture, mix crushed nuts into the Oreo crumbs for a crunchy contrast in your dirt cups.
Chocolate Lava Patch: Create a layer of chocolate ganache as a base for added richness, allowing for a melty surprise when you dig in.
Tropical Escape: Swap out some chocolate pudding layers for coconut pudding to create a tropical vibe that pairs wonderfully with fresh pineapple pieces.
Herb-Infused Delight: For a savory twist, infuse your chocolate by steeping mint or basil in the cream while melting the white chocolate, offering an unexpected flavor profile.
FAQs
Can I make this ahead of time?
Absolutely! You can prepare the pudding a day in advance and store it in the refrigerator. Just make sure to keep it covered to avoid drying out.
How do I store leftovers?
Leftover Carrot Patch Dirt Cups can be stored in the refrigerator in an airtight container for up to 3 days. Enjoy them cold!
Can I freeze this dish?
Freezing isn’t recommended because the texture of the pudding and strawberries can change. However, leftover pudding and crushed Oreos can be frozen separately.
What can I substitute for Oreos?
If you’re looking for a different cookie, chocolate wafer cookies or even graham crackers can provide a great alternative.
How do I prevent the chocolate from hardening too quickly?
Make sure to melt the chocolate gently, and work at room temperature for best results. If it begins to harden, you can reheat it briefly in the microwave.
Is this gluten-free?
Typically, Oreos are not gluten-free, but you can easily find gluten-free cookie alternatives at your local store.
Can I double this recipe?
Definitely! Just ensure you use a larger mixing bowl for the pudding and have enough cups for serving.
With this well-rounded recipe for Carrot Patch Dirt Cups, you’ll not only indulge your sweet tooth but also create delightful memories in the kitchen. Enjoy making and sharing this playful dessert!
Carrot Patch Dirt Cups
Ingredients
Pudding Mixture
- 2 boxes chocolate pudding mix (3 oz each)
- 4 cups cold whole milk
Toppings
- 20 pieces Oreos, crushed
- 12 pieces fresh strawberries Ensure stems remain intact.
- 10 ounces white chocolate melting wafers
- as needed orange food coloring (or red + yellow)
Instructions
Preparation
- In a large bowl, combine the pudding mix and cold milk. Stir vigorously for about two minutes until fully blended and let it set for approximately five minutes.
- In a microwave-safe bowl, melt the white chocolate wafers in 30-second increments, stirring after each interval until smooth and fully melted.
- Add a few drops of orange food coloring to the melted white chocolate and mix well until you achieve your desired shade.
- Carefully roll the strawberries into the melted chocolate, then place them on parchment paper to set.
Assembly
- Spoon the thick pudding into cups, sprinkle the crumbled Oreos on top, and finish with a couple of chocolate-covered strawberries.