
There’s something magical about Christmas morning—the aroma of cinnamon and nutmeg fills the air, and the soft glow of fairy lights dances around the room. As a child, my family gathered around the kitchen, eagerly waiting for the moment the presents were unwrapped. Among the many traditions we cherished, one stood out—my grandmother’s holiday treat: No Bake Peppermint Bars. I remember the first time we made them together; the cool, creamy layers would melt in your mouth while the hint of peppermint transported us to a winter wonderland. Every bite became a moment of pure joy, and now, I’m excited to share this delight with you. These bars are the perfect edible centerpiece for your holiday gatherings and a fantastic way to keep the oven off while still indulging in a festive treat!
Why You’ll Love This Recipe
- Effortless: No baking required, so you can spend more time with loved ones!
- Quick Prep: Whip these up in just a matter of minutes.
- Crowd-Pleasing: Peppermint and chocolate—it’s a classic combo everyone adores.
- Fancy & Fun: They look as festive as they taste—perfect for holiday gatherings.
- Customizable: So many ways to make these special with your own twist!
Ingredients
- 2 cups chocolate cookie crumbs: These provide the perfect crust; go for your favorite brand or make your own!
- 1/2 cup unsalted butter, melted: This helps bind the cookie crumbs together and adds richness to the crust.
- 2 cups semi-sweet chocolate chips: A key player in this recipe; choose a high-quality brand for the best flavor.
- 1 cup heavy whipping cream: This will give your bars a luscious, smooth texture.
- 1/2 teaspoon peppermint extract: Just the right kick of wintery goodness!
- 1/4 cup powdered sugar: This sweetens the whipped cream, making it light and fluffy.
- Crushed peppermint candies for topping: The finishing touch—add a sprinkle for a festive crunch!
Full recipe card is below.
How to Make It
1. Prepare the Cookie Crust
In a mixing bowl, combine the chocolate cookie crumbs and melted butter. Stir until it resembles wet sand, then press the mixture firmly into the bottom of a greased 9×9 inch pan. Think of it as laying the foundation for your peppermint paradise!
2. Melt the Chocolate
In a saucepan over low heat, melt the chocolate chips, stirring until completely smooth and glossy. The rich scent will fill your kitchen, and honestly, it’s hard not to sneak a taste!
3. Whip the Cream
In another bowl, whip the heavy cream with the powdered sugar and peppermint extract until stiff peaks form. It’s as if you’re capturing the spirit of winter in every whip—fluffy, light, and oh-so-delicious!
4. Combine Chocolate and Cream
Now fold half of the whipped cream into the melted chocolate mixture, being gentle to maintain the airy texture. This step creates a beautifully smooth and creamy layer of chocolate.
5. Layer it Up
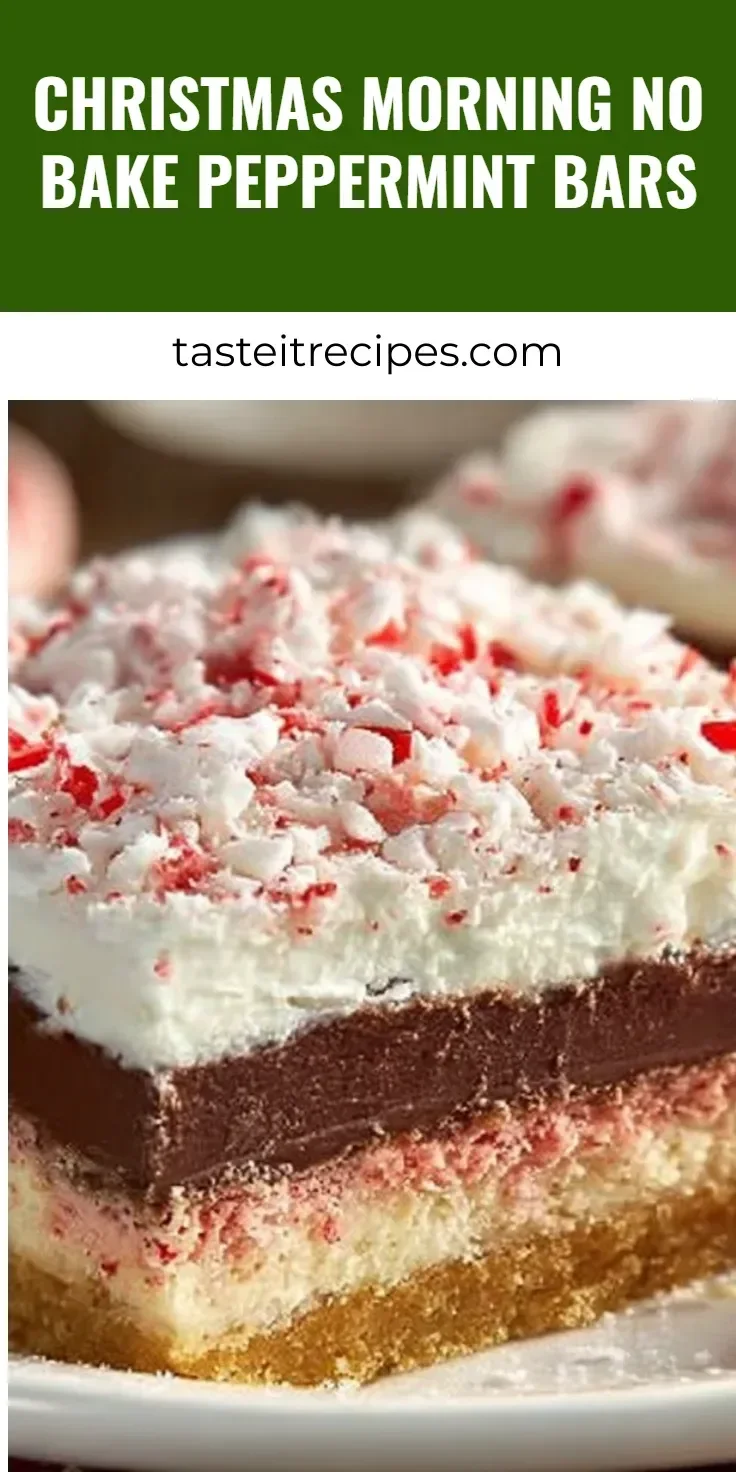
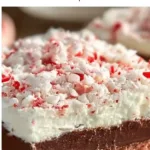
Pour that luscious chocolate mixture over the cookie crust, then gently top with the remaining whipped cream. Take a moment to admire your layers—so pretty!
6. Chill to Perfection
Chill in the refrigerator for at least 4 hours until set. The anticipation will be hard, but trust me, it’s worth the wait!
7. Add the Topping
Before serving, sprinkle crushed peppermint candies on top. This adds a delightful crunch and a pop of color—now your bars are ready to shine on the table!
Pro Tips for Success
- Always use room temperature ingredients for better blending.
- Don’t rush the chilling time; letting it set perfectly will pay off!
- Feel free to taste as you go—cooking is all about finding your perfect balance!
Flavor Variations
- Swap out the chocolate cookie crumbs with graham cracker crumbs for a different flavor.
- For a richer taste, try adding a splash of coffee or espresso powder to the chocolate mixture.
- Looking for a twist? Use orange extract instead of peppermint for a festive citrus flair!
Serving Suggestions
These bars shine when paired with a dollop of whipped cream on the side and a warm mug of hot cocoa. You can also serve them on a decorative platter sprinkled with more crushed peppermint candies for a beautiful display!
Make-Ahead & Storage
These bars can be made up to 3 days in advance, which makes them perfect for holiday prep! Store them in the refrigerator, covered tightly with plastic wrap, to keep them fresh and delicious.
Leftovers
If you have any leftovers (which is rare!), crumble them over a bowl of vanilla ice cream or mix them into a milkshake for a festive twist that’ll delight your taste buds!
Freezing
Yes, these can be frozen! Wrap individual bars tightly in plastic wrap, then place them in an airtight container. When you’re ready to indulge, simply thaw them in the fridge overnight.
Reheating
These bars are best served cold, so reheating isn’t necessary. If you do want a warm twist, consider melting a little chocolate to drizzle over the top just before serving!
FAQs
Can I use a different type of cookie for the crust?
Absolutely! Any cookie you love will work—just adjust the amount of butter as needed to bind the crumbs.
How do I make these bars gluten-free?
Simply use gluten-free chocolate sandwich cookies to create the crust, and you’re all set!
Can I use whipped topping instead of fresh cream?
Yes, you can! This will speed up your prep time if you’re in a rush.
What’s the best way to cut these bars without them falling apart?
Use a sharp knife, warmed under hot water and dried off for each cut. This helps maintain clean edges and keeps your layers intact!
Final Thoughts
Gathering in the kitchen to create something sweet is one of my favorite holiday traditions. These Christmas Morning No Bake Peppermint Bars are not just a dessert; they’re a shared experience, a moment that brings loved ones together in laughter and warmth. As you make these delightful bars, I hope you fill your kitchen with joy, love, and the delightful scent of peppermint. Wishing you all a cozy, sweet holiday season filled with wonderful memories. Happy baking—enjoy every delicious moment!
Stay tuned for the full recipe card below!
No Bake Peppermint Bars
Ingredients
For the Crust
- 2 cups chocolate cookie crumbs These provide the perfect crust; go for your favorite brand or make your own!
- 1/2 cup unsalted butter, melted This helps bind the cookie crumbs together and adds richness to the crust.
For the Filling
- 2 cups semi-sweet chocolate chips A key player in this recipe; choose a high-quality brand for the best flavor.
- 1 cup heavy whipping cream This will give your bars a luscious, smooth texture.
- 1/2 teaspoon peppermint extract Just the right kick of wintery goodness!
- 1/4 cup powdered sugar This sweetens the whipped cream, making it light and fluffy.
- to taste Crushed peppermint candies for topping The finishing touch—add a sprinkle for a festive crunch!
Instructions
Preparation
- In a mixing bowl, combine the chocolate cookie crumbs and melted butter. Stir until it resembles wet sand, then press firmly into the bottom of a greased 9×9 inch pan.
- In a saucepan over low heat, melt the chocolate chips, stirring until completely smooth and glossy.
- In another bowl, whip the heavy cream with the powdered sugar and peppermint extract until stiff peaks form.
- Fold half of the whipped cream into the melted chocolate mixture to create a smooth and creamy chocolate layer.
- Pour the chocolate mixture over the cookie crust, then top with the remaining whipped cream.
- Chill in the refrigerator for at least 4 hours until set.
- Before serving, sprinkle crushed peppermint candies on top.